Online, a shopper can't pick the piece up, so the photos have to do what the shop counter used to. They need to show the design clearly, get the colour of the metal and stones right, and make the size obvious. Every image should answer something a customer would ask in person, like how big it is, how it catches the light or how it'll look on them.
It's one of the trickiest categories we shoot. Metal reflects everything in the room, stones go dull or blow out, and fine detail vanishes on a phone screen. Below is the shot list we plan for every product page, how we light metal and stones, what we do on-model, our retouching rules and a checklist you can copy. If you'd rather have it done for you, our content production team shoots jewellery at our studio in Delhi.
The shot list every jewellery product page needs
Plan these shots for each piece before the shoot starts.
- White-background hero. The piece on a clean white or very light background, sharp edge to edge. This is your main listing image and the one marketplaces usually require.
- Angles. Front, side, back and the clasp or closure. For rings, the profile and the inside of the band.
- Macro detail. Close-ups of stone settings, engraving, meenakari work or filigree, so shoppers can see the craftsmanship.
- Scale. On a model, or next to something familiar, so the size is obvious.
- Styled lifestyle. The piece in context: with an outfit, on a dressing table, in a gift setting.
- Packaging. The box or pouch, especially if you sell gifts.
- Video. A short rotating clip or an on-model clip that shows how the stones catch the light. Sparkle comes through far better in movement than in a still.
Lighting metal and stones
With jewellery, most of the lighting work goes into controlling reflections.
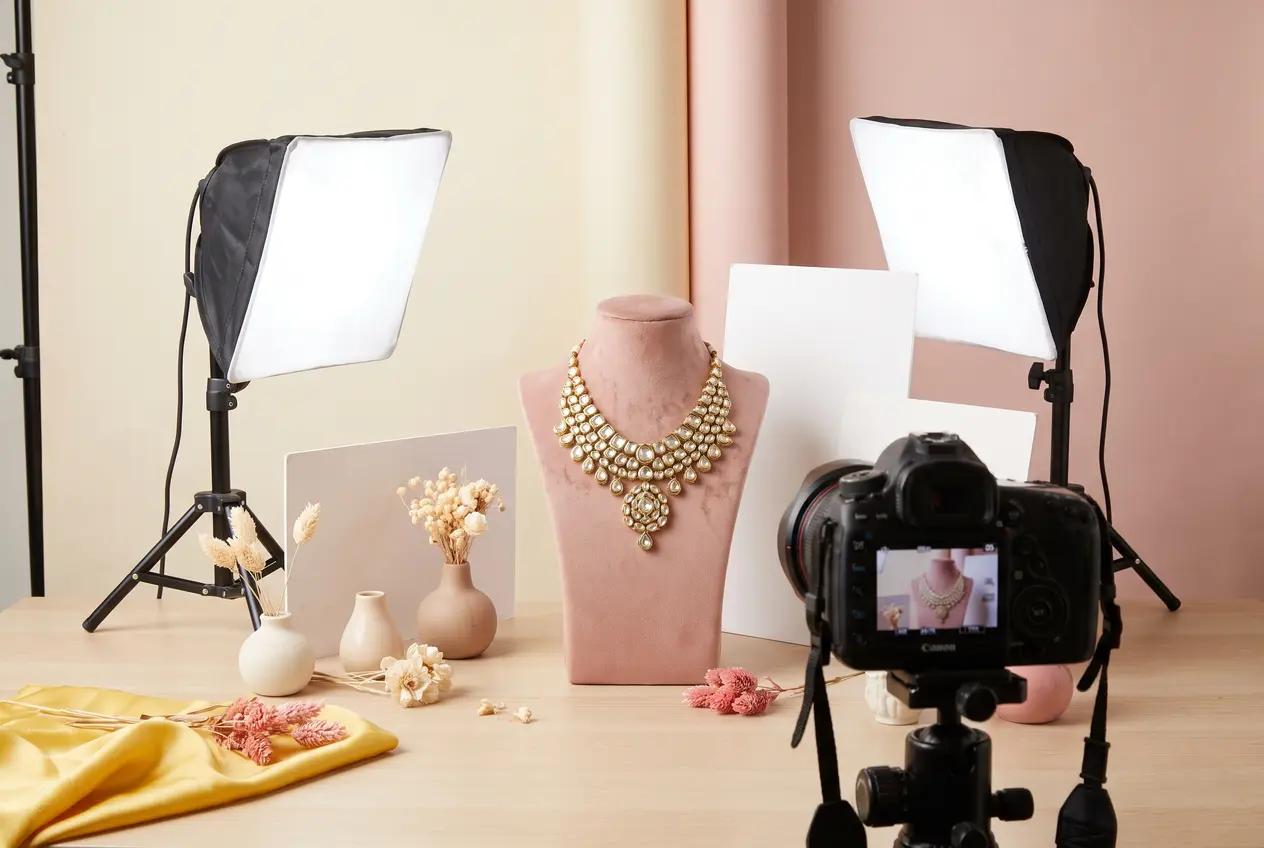
- Use large, soft, diffused light. Small, hard light sources create harsh hotspots on metal. A big diffused source wraps around the piece and gives gold and silver a smooth, even shine.
- Shape reflections with white and black cards. Metal reflects its surroundings. White cards around the piece add bright, clean reflections; black cards add contrast and definition so polished surfaces don't look flat and grey.
- Avoid hotspots. If one area burns out to pure white, move or diffuse the light until you can see the metal's texture again.
- Add a small, focused light for sparkle. Diamonds and coloured stones need a little direct light to show fire and brilliance, used sparingly so it doesn't overpower the metal.
- Keep the light consistent across the catalogue. Set up once, note the positions and reuse them, so every product in a collection looks like it belongs together.
Backgrounds and props by style
| Style | Backgrounds that work | Props and mood |
|---|---|---|
| Fine gold and diamond | White, ivory, soft grey, velvet in deep tones | Minimal; let the piece breathe |
| Kundan, polki and bridal | Rich velvet, silk, warm neutrals | Marigolds, brocade, mirrors, used lightly |
| Silver and oxidised | Stone, linen, textured cream or terracotta | Handcrafted objects, earthy tones |
| Demi-fine and fashion | Pastels, bold colour blocks, paper textures | Playful props that match your brand |
Whichever you go with, keep the hero image clean and save the styling for the lifestyle shots.
On-model shots for scale and styling
A lot of jewellery returns come down to the piece being bigger or smaller than the shopper pictured. On-model shots fix most of that.
- Necklaces: shoot on different necklines (round, V, boat, off-shoulder), so shoppers see where the piece sits.
- Earrings: show them from the front and side, with hair tied back, so length and drop are clear.
- Rings and bangles: shoot on hands in a natural pose, and stack them if you sell stacking pieces.
- Skin tones: gold, rose gold and silver look different on different skin tones. Shooting on more than one model helps shoppers picture the piece on themselves.
Our jewellery industry page covers how these shots fit into ads and product pages.
Focus stacking for macro sharpness
At very close distances, only a thin slice of the piece is in focus. Focus stacking means taking several shots at different focus points and blending them into one image that's sharp from front to back. It's how we get sharp macro shots of settings and engraving, and it's worth the extra time on your hero products.
Colour accuracy: gold should look like gold
Shoppers compare what arrives with what they saw. If yellow gold looks orange, or a ruby looks pink, you'll get returns and complaints.
- Use a colour checker at the start of each set-up and correct to it in editing.
- Lock your white balance so it doesn't shift between shots.
- Check on more than one screen, including a phone, before publishing.
Retouching rules
Retouching is there to clean the photo up. It should never change the product.
- Do: remove dust, fingerprints, small scratches from handling and background marks. Even out the background.
- Don't: change the design, add stones, change stone colour, change the metal tone or make a piece look larger.
Heavy retouching leads to disappointed customers and returns. Photos that match the piece are what bring people back.
Hallmark and HUID close-ups
In India, hallmarked gold jewellery carries a hallmark that includes a 6-digit HUID (Hallmark Unique Identification) number. A clear macro shot of the hallmark on your product page is a simple way to build trust, especially for first-time buyers on your own store. Keep it sharp and readable, and make sure the photo matches the piece being sold.
Marketplace vs your own store
Marketplaces usually set strict rules for the main image, such as a plain white background and the product filling most of the frame. Check each marketplace's current image guidelines before you shoot. On your own store you have more freedom: a lifestyle image can lead the collection page, and video can sit high on the product page. Shoot once for both by planning white-background and styled versions of every piece on the same day. The product video shoot checklist explains how to get stills and video from one set-up.
DIY or studio?
DIY can work for a small catalogue with a simple light tent, a steady tripod and patience. It gets hard as soon as you need consistent results across hundreds of pieces, on-model shots or video.
A studio gives you controlled lighting, macro equipment, models and retouching in one place, and keeps a large catalogue looking consistent. That matters once product pages have to sell. Our post on why every D2C brand needs product videos shows how jewellery video fits into the rest of your content.
How we shoot jewellery at our Delhi studio
At GrooveNexus Studios, jewellery shoots happen at our studio in Mayur Vihar Phase 1. We agree the shot list per piece before the shoot, set up lighting once for consistency across the collection, and shoot white-background, macro, on-model and video on the same day. Retouching follows the rules above. Brands across Delhi NCR can drop off pieces, and brands elsewhere can courier them. Read more about our Delhi studio.
Copyable jewellery shot list
| Shot | What to show | Where it's used | Done |
|---|---|---|---|
| White-background hero | Full piece, sharp, centred | Main product image, marketplaces | |
| Angles | Front, side, back, clasp | Product page gallery | |
| Macro detail | Settings, engraving, stones | Product page, ads | |
| Hallmark close-up | Hallmark and HUID, readable | Product page | |
| On-model | Scale on neckline, ear or hand | Product page, ads | |
| Lifestyle | Styled with outfit or setting | Collection page, social | |
| Packaging | Box or pouch | Product page, gifting ads | |
| Video | Rotation or on-model movement | Product page, Reels, ads |
FAQs
What is the best background for jewellery photography?
For hero and marketplace images, a clean white or light background. For lifestyle shots, choose backgrounds that match the style: velvet for bridal, textured neutrals for silver, colour for fashion jewellery.
How do you stop reflections in jewellery photos?
Use large diffused light, then shape the reflections with white and black cards around the piece. Move the camera slightly if you can see yourself or the camera in polished metal.
Do I need on-model photos for jewellery?
Yes, for most pieces. On-model photos show scale and how the piece sits, which reduces returns from size surprises.
Can I edit jewellery photos to make stones look better?
Clean dust and marks, and correct colour to match the real piece. Don't change stone colour, metal tone or the design. Customers should get exactly what they saw.
How many photos does a jewellery product page need?
Enough to answer every question a shopper would ask in a shop: hero, angles, detail, scale and ideally a short video. Plan the full set before the shoot.
If you need jewellery photos that show each piece accurately and at its best, see our content production service or get in touch. We reply within 1 business day.